By now, most WordPress developers are aware that launching a free online WordPress site only requires two clicks on TasteWP.com. This WP sandbox environment allows users to freely experiment with anything related to WordPress and build websites from the ground up.
But what about staging environment for WordPress? Unlike a basic test site, a staging site is essentially a replica of your live site, used for edits and tests that are more relevant to your live environment. Importantly, making changes on a staging site has no consequences for your live site.
This is why WP webmasters need staging sites. In this article, we’ll guide you through the process of setting up a staging site, both locally and remotely, using a user-friendly plugin: the Backup Migration plugin, which you can test for free here.
Creating a Local Staging Site
Local staging sites, a common choice for developers, use local server resources. This option might be faster, more comfortable, and sometimes more relevant in terms of reflecting website performance changes. Here is how to create free WordPress staging site:
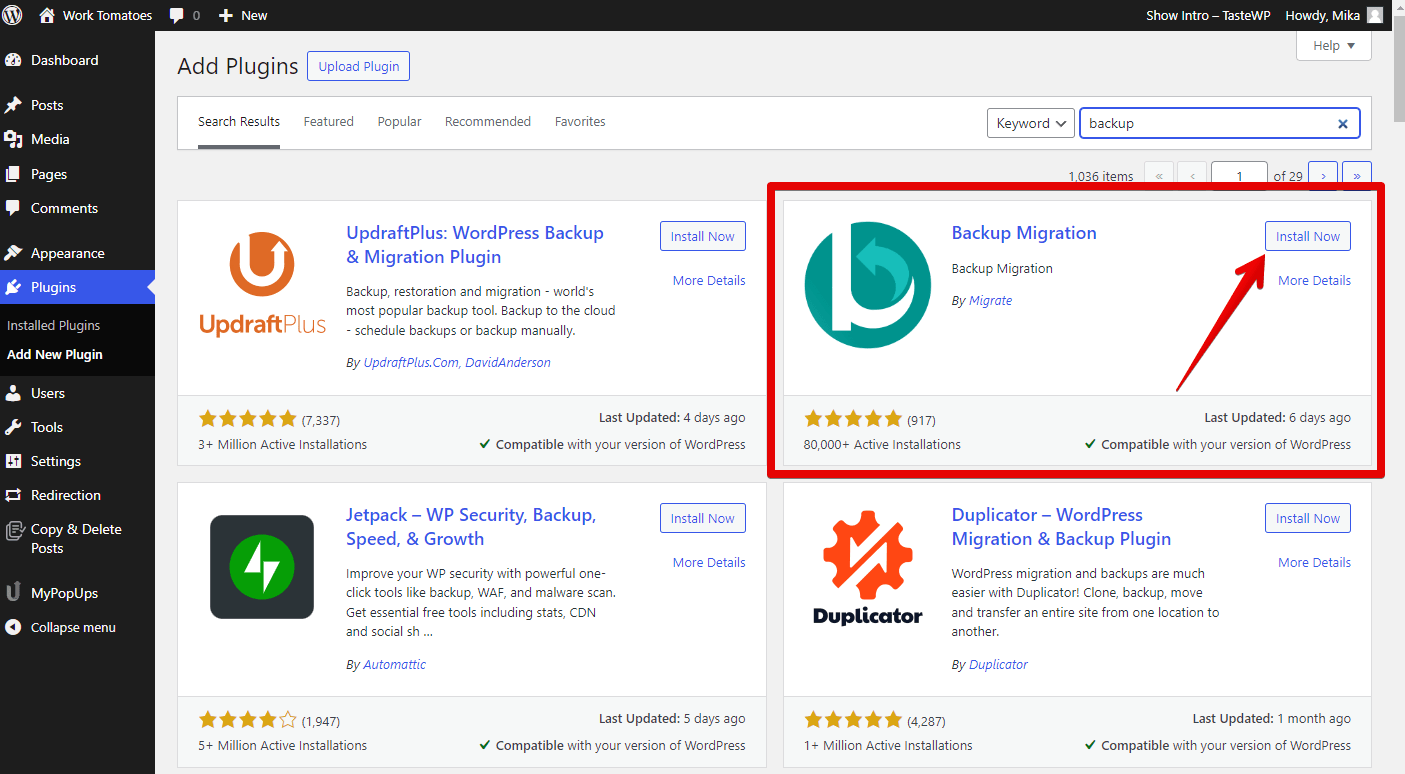
1. Start by installing the free WordPress staging plugin Backup Migration (BackupBliss) on your live website, available in the official WordPress repository.
2. Once installed and activated, the Backup Migration plugin will redirect you to its menu screen, also accessible through the sidebar in the WP admin dashboard. Click on the “Create a staging site” button in the top navigation bar.
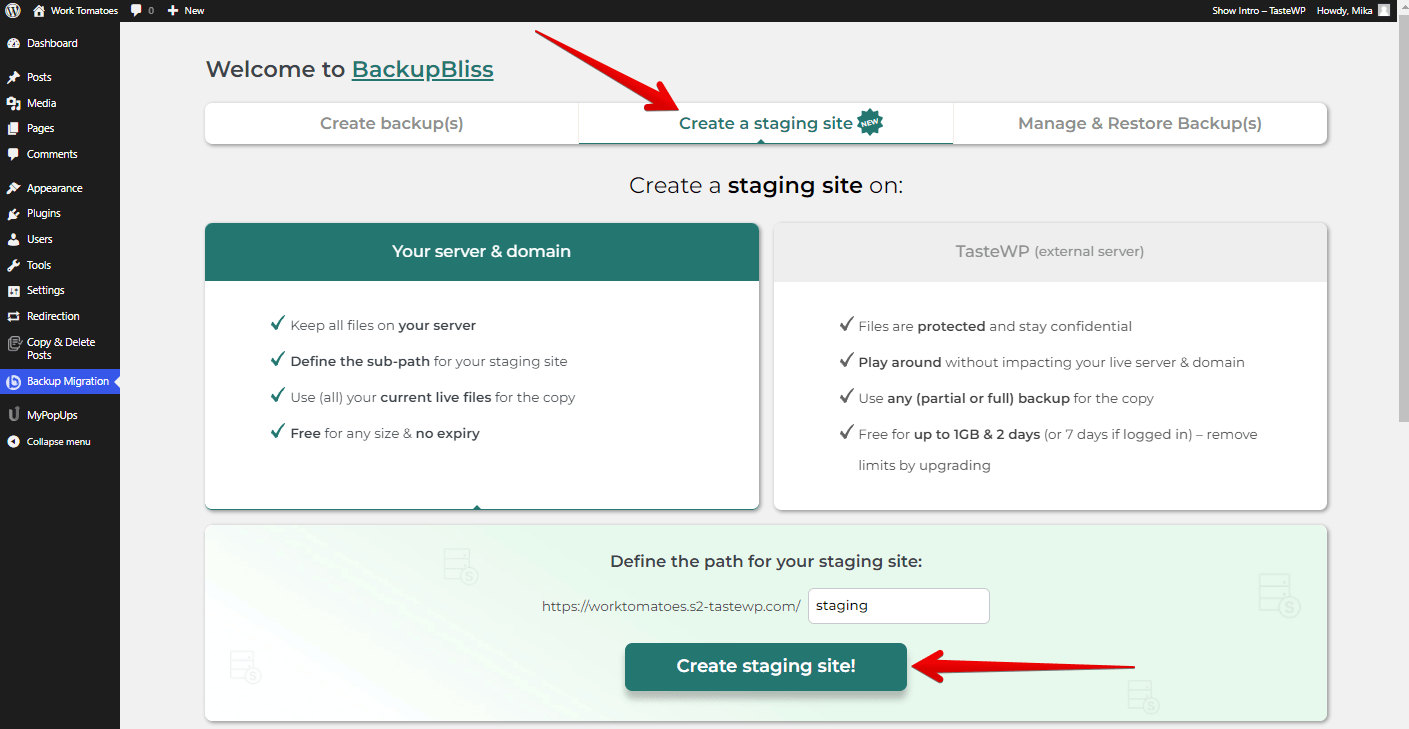
3. On this screen, you’ll see two destination types for your staging site: local (Your server & domain) or remote (on TasteWP). Local is selected by default. You can specify a path for WordPress staging subdomain here. Adjust as needed, then click “Create staging site!”.
Shortly after, your WordPress local staging will be ready for you to visit.
Creating a Remote Staging Site
Remote staging sites also have their benefits. They don’t consume hosting/server resources, allowing the live site to function without any hindrance. They’re ideal for experimenting with major changes or software of uncertain origin.
The creation process differs slightly:
1. In the “Create a staging site” plugin menu, select “TasteWP (external server)”.
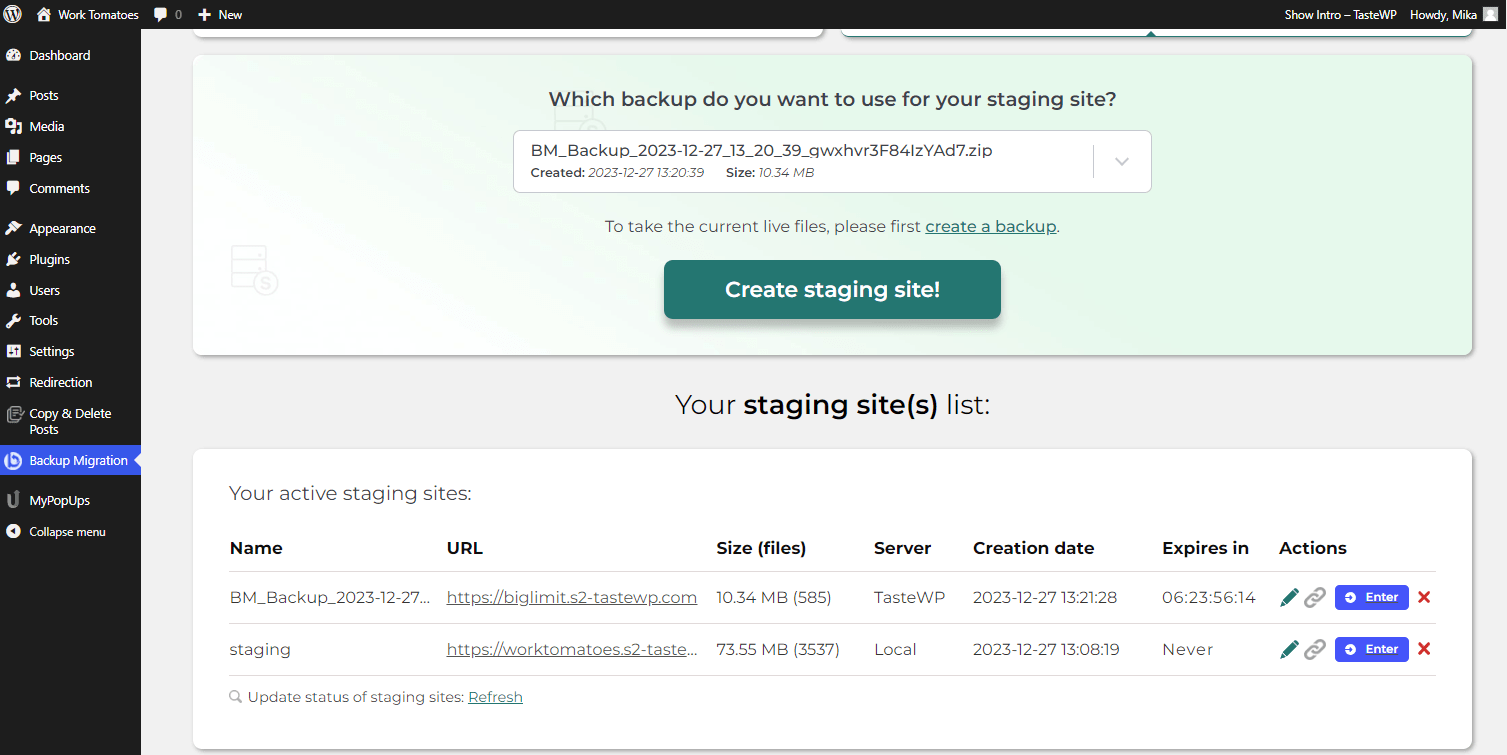
2. Click on “Create backup!” if you don’t already have a site backup. After the backup, click “Create staging site!”.
In a few moments, your remote WordPress staging mode site will be prepared for you to visit.
Managing Staging Sites
Manage all your staging sites from the Backup Migration plugin’s “Create a staging site” section. Here, you can enter the site’s admin area, rename sites, or delete them. Note that expiring test sites on TasteWP have an expiration timer, and will be automatically removed upon expiry. If you want to keep the staging site live for prolonged period of time, consider upgrading it.
You can also use the Backup Migration plugin to migrate staging to live WordPress, if desired.
Staying on the Safe Side
Making changes on a staging site is safer than modifying the live site directly. It’s wise to make backups of the live site as a security practice. With the Backup Migration plugin, you can also set up automatic (scheduled) backups of your site.
Like staging sites, you can store your website backups locally or remotely, depending on your convenience.
In summary
Now you know a quick and easy way how to create free WordPress staging site. The only thing you need on your original website is the Backup Migration plugin, and you can combine it with TasteWP at your convenience. It all takes just a minute to set up, so go ahead and give it a try!